> ## Documentation Index
> Fetch the complete documentation index at: https://instro.nominal.io/llms.txt
> Use this file to discover all available pages before exploring further.
# Digital Multimeter (DMM)
> Using InstroDMM for SCPI-based digital multimeters
`InstroDMM` provides a unified interface for digital multimeters. This class is initialized with a vendor-specific driver (`Agilent34401A`, `Keysight34461A`, `Keithley2400`, …), and provides the vendor-agnostic API (`set_measurement_function`, `read`, `set_range`, …).
## Creating an InstroDMM
```python theme={null}
from instro.dmm.drivers import Agilent34401A
from instro.dmm import InstroDMM
dmm = InstroDMM(
name="myDMM",
driver=Agilent34401A("ASRL3::INSTR"),
)
```
## Supported Vendors
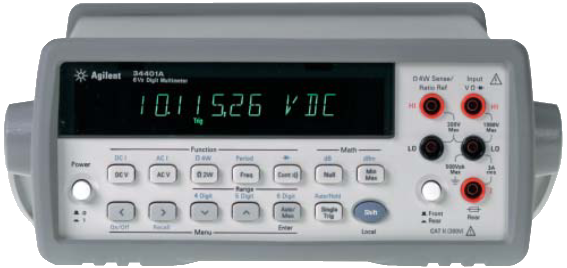
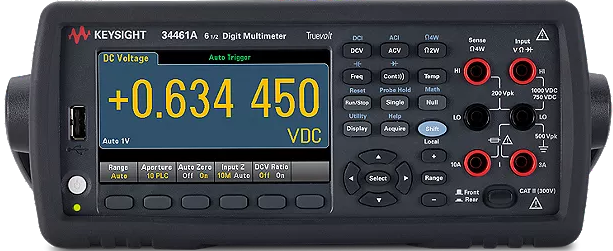
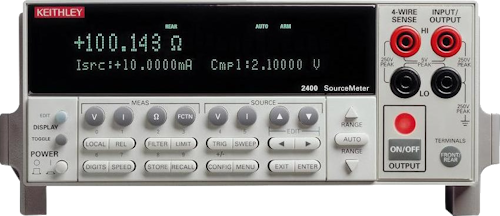 * **Simulated**: no hardware required; pairs with the bundled [DMM simulator](/library/simulated-instruments#dmm-simulator) (`SimulatedDMM`)
If your vendor or model is not listed, see [Custom Driver Development](/library/custom-instruments#digital-multimeter-dmm), or open a [Driver Request](https://github.com/nominal-io/instro/issues) issue on GitHub.
## Example
More examples found in [Examples](examples/dmm/index)
## Details
The following presents details about the `InstroDMM`. Specific driver details can be found on [their pages](#supported-vendors).
### Driver Composition
An `InstroDMM` is built from a concrete driver:
```
InstroDMM("name", driver=Agilent34401A("ASRL3::INSTR"))
```
* **`Agilent34401A`** owns the connection setup and vendor-specific command mapping.
* **`InstroDMM`** owns the category-level workflow: measurements, commands, publishers, the background daemon.
### Lifecycle
The typical InstroDMM workflow:
1. **Construct**: instantiate the vendor driver and pass it to `InstroDMM`.
2. **`open()`**: establishes the VISA connection.
3. **Configure measurement**: set the measurement function (e.g. DC voltage), and optionally resolution, aperture, and range.
4. **`read()`**: trigger a measurement and get the value. The `read_()` shorthands (e.g. `read_dc_voltage()`) fold steps 3 and 4 into one call.
5. **`close()`**: disconnect from hardware.
Optionally, you can use background fetching via `start()` / `stop()`, but it is an atypical use case for a DMM. See [Two ways to get data](/using-instro#two-ways-to-get-data) for more.
### Measurement Functions
`InstroDMM` supports these measurement functions (availability depends on the driver):
* **DC Voltage**
* **AC Voltage**
* **DC Current**
* **AC Current**
* **2-Wire Resistance**
* **4-Wire Resistance**
You must call `set_measurement_function()` before configuring resolution, aperture, range, or calling `read()`.
### Single-call reads
When you only need a value and don't need to tune resolution, aperture, or range, use the per-function shorthand instead of the two-step sequence:
```python theme={null}
voltage = dmm.read_dc_voltage() # selects DC voltage if needed, then reads
```
One exists per measurement function: `read_dc_voltage()`, `read_ac_voltage()`, `read_dc_current()`, `read_ac_current()`, `read_resistance()` (2-wire), and `read_four_wire_resistance()`.
Each selects the function only when it isn't already active, so repeated calls in the same function cost a single measurement and publish `set_measurement_function.cmd` once. They publish exactly the same channels as `set_measurement_function()` + `read()`.
### Init from a Config File
`InstroDMM` can also be constructed directly from a JSON config file, which removes the need to write any Python setup code:
```python theme={null}
from instro.dmm import InstroDMM
dmm = InstroDMM(config="bench_dmm.json")
```
Where `bench_dmm.json` contains:
```json theme={null}
{
"version": 1,
"instrument": "InstroDMM",
"device": {
"name": "bench_dmm",
"description": "Bench multimeter",
"manufacturer": "Keysight",
"model": "34461A"
},
"driver": {
"name": "Keysight34461A",
"connection_type": "visa",
"visa": {
"visa_resource": "USB0::0x2A8D::0x1301::MY12345678::INSTR"
}
},
"measurement": {
"function": "DC_VOLTAGE",
"aperture_nplc": 10,
"range": 10.0
},
"timing": {
"poll_interval": 1.0
},
"publishers": [
{
"type": "NominalCorePublisher",
"dataset_rid": ""
}
]
}
```
See [Config Files](/library/config-files) for the full field reference.
## Custom Driver Development
For more information on writing a custom driver, see [Custom Driver Development](/library/custom-instruments#digital-multimeter-dmm).
* **Simulated**: no hardware required; pairs with the bundled [DMM simulator](/library/simulated-instruments#dmm-simulator) (`SimulatedDMM`)
If your vendor or model is not listed, see [Custom Driver Development](/library/custom-instruments#digital-multimeter-dmm), or open a [Driver Request](https://github.com/nominal-io/instro/issues) issue on GitHub.
## Example
More examples found in [Examples](examples/dmm/index)
## Details
The following presents details about the `InstroDMM`. Specific driver details can be found on [their pages](#supported-vendors).
### Driver Composition
An `InstroDMM` is built from a concrete driver:
```
InstroDMM("name", driver=Agilent34401A("ASRL3::INSTR"))
```
* **`Agilent34401A`** owns the connection setup and vendor-specific command mapping.
* **`InstroDMM`** owns the category-level workflow: measurements, commands, publishers, the background daemon.
### Lifecycle
The typical InstroDMM workflow:
1. **Construct**: instantiate the vendor driver and pass it to `InstroDMM`.
2. **`open()`**: establishes the VISA connection.
3. **Configure measurement**: set the measurement function (e.g. DC voltage), and optionally resolution, aperture, and range.
4. **`read()`**: trigger a measurement and get the value. The `read_()` shorthands (e.g. `read_dc_voltage()`) fold steps 3 and 4 into one call.
5. **`close()`**: disconnect from hardware.
Optionally, you can use background fetching via `start()` / `stop()`, but it is an atypical use case for a DMM. See [Two ways to get data](/using-instro#two-ways-to-get-data) for more.
### Measurement Functions
`InstroDMM` supports these measurement functions (availability depends on the driver):
* **DC Voltage**
* **AC Voltage**
* **DC Current**
* **AC Current**
* **2-Wire Resistance**
* **4-Wire Resistance**
You must call `set_measurement_function()` before configuring resolution, aperture, range, or calling `read()`.
### Single-call reads
When you only need a value and don't need to tune resolution, aperture, or range, use the per-function shorthand instead of the two-step sequence:
```python theme={null}
voltage = dmm.read_dc_voltage() # selects DC voltage if needed, then reads
```
One exists per measurement function: `read_dc_voltage()`, `read_ac_voltage()`, `read_dc_current()`, `read_ac_current()`, `read_resistance()` (2-wire), and `read_four_wire_resistance()`.
Each selects the function only when it isn't already active, so repeated calls in the same function cost a single measurement and publish `set_measurement_function.cmd` once. They publish exactly the same channels as `set_measurement_function()` + `read()`.
### Init from a Config File
`InstroDMM` can also be constructed directly from a JSON config file, which removes the need to write any Python setup code:
```python theme={null}
from instro.dmm import InstroDMM
dmm = InstroDMM(config="bench_dmm.json")
```
Where `bench_dmm.json` contains:
```json theme={null}
{
"version": 1,
"instrument": "InstroDMM",
"device": {
"name": "bench_dmm",
"description": "Bench multimeter",
"manufacturer": "Keysight",
"model": "34461A"
},
"driver": {
"name": "Keysight34461A",
"connection_type": "visa",
"visa": {
"visa_resource": "USB0::0x2A8D::0x1301::MY12345678::INSTR"
}
},
"measurement": {
"function": "DC_VOLTAGE",
"aperture_nplc": 10,
"range": 10.0
},
"timing": {
"poll_interval": 1.0
},
"publishers": [
{
"type": "NominalCorePublisher",
"dataset_rid": ""
}
]
}
```
See [Config Files](/library/config-files) for the full field reference.
## Custom Driver Development
For more information on writing a custom driver, see [Custom Driver Development](/library/custom-instruments#digital-multimeter-dmm).